
4.1. The Manage View
The Manage View is the primary working view for managing production plans and contains most of the core features of vPlanner to visualize and analyze the overall plan.
Users of the Manage View
Among many other things, you can use this view to:
-
Review the entire plan or parts of the plan when applying filters.
-
Arrange the visible tasks into layouts or swimlanes.
-
Use swimlanes to arrange tasks based on their assigned attributes, by date, or both.
-
Trace how the planned tasks are connected by following handoffs logic through tracing predecessors and successors.
-
Analyze longest paths.
-
Isolate late tasks to focus re-planning efforts.
Generally speaking, you can do everything in vPlanner from the Manage View. The other Working Views are intended to be supplementary views and provide various way of viewing, organizing, or communicating parts of the plan while providing limited editing capabilities that are suitable for that type of view.
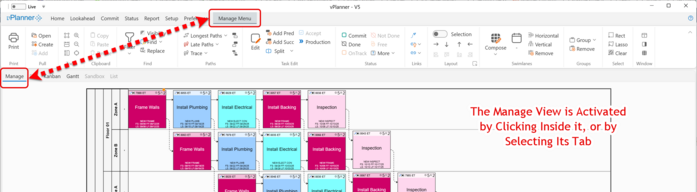
Figure 16 – The Manage View
 Click the Print icon or "CNTR-P" when the Manage View is active to switch to the Print Preview screen to prepare to print the visible tasks in the Manage View.
|
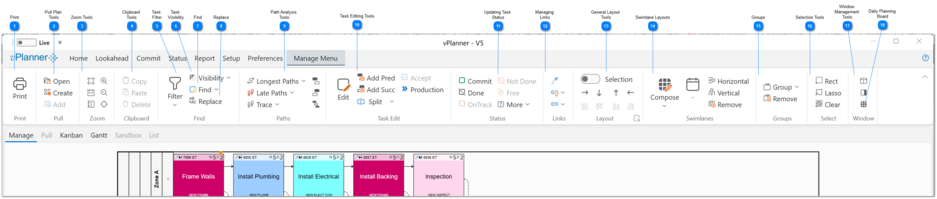
Pull Plan Tools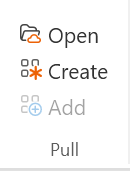 The icons in the Pull section of the Manage Ribbon will allow you to open a Pull view and if you have the proper permissions to Create a new Pull view or to add tasks from the Manage View to an existing and open Pull View.
Pull Views are interactive shared whiteboards that contain parts of the plan from the Manage View where team members can work together and share not only the data about the tasks but also their positions on the board in real-time. See the Pull View help page for more detail.
Open: The Open button will switch you to the Pull Board panel so you review the existing pull board and open one of them.
|
Clipboard Tools Copy and Paste: You can Copy and Paste tasks that you have permissions to modify.
When you make a multi-task selection, the selected tasks and their associated inner links can be copied and pasted as a group. Standard Windows shortcuts CNTR-C and CONTR-P work as well for copy and paste. The buttons will be grayed out if there is no valid selection or if the clipboard is empty.
When you select a task or a set of tasks that you access permission allows you to modify, the Copy button will be enabled. Once you make a copy and there are elements in the Clipboard the Paste button will be enabled. You can paste multiple times once the tasks are in the Clipboard. We recommend that after each paste that you move the result away from the original tasks before you paste again if you are making multiple copies of the same things. The result of the Paste will be selected automatically for that purpose.
Delete: You are able to delete tasks that you have permission to modify. The tasks and their associated links will be deleted. vPlanner will ask you to confirm before it allows a Delete command to continue.
| ||
Task Filter Or Or 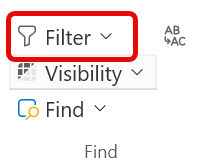 Depending on your screen size and resolution, the task filter icon may appear large like the above icon or small as in the above images (it may also just show the icon due to the responsive design of the ribbon).
Use the task filter to isolate parts of the plan based on specific attributes that are assigned to the tasks.
The Task Filter works the same in all the Working Views with one exception in the Manage View where you have the added option to filter the tasks without applying a Swimlane layout or Filter the tasks and apply a swimlane layout automatically. You control this setting from the slider button at the bottom right side of the filter to enable or disable the swimlanes option before applying the filter results.
 Read more about the Task Filter.
.
|
Task VisibilityYou can use the tools under the Visibility pull down to show or hide all tasks in the project or to selectively hide certain tasks. Some of the visibility tools are also available under the right-click menu when you select a task or a number of tasks and right click while the selection is active.
The last option under Visibility will allow you to identify all the tasks in the project that are not attached to a milestone downstream.
|
FindUse the Find Panel to search for a task by Task ID (or external ID) or other commonly used searches by Task Duration, Description, or Resource Count. See the Find Tasks Panel for more details.
|
ReplaceUse the Replace tool to find partial text in the task description and replace it without having to edit the entire task description. This is useful when you need to make corrections to specific parts of the description for multiple tasks at once. See Search and Replace for more details.
|
Path Analysis Tools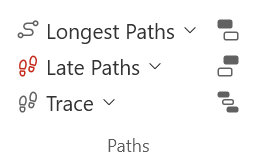 The path analysis tools are used to visualize and analyze how the plan is connected.
|
Task Editing Tools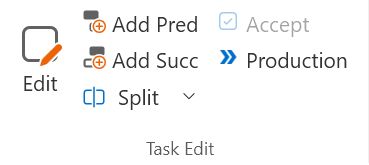 This ribbon section groups all the task editing tools in one place. You will find variations on those tools in all Working Views. The buttons will be enabled when you make a selection that contains tasks that can be edited by you.
See Task Editing Tools for more details.
|
Updating Task Status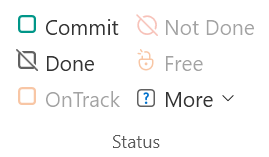 This ribbon section groups all the tools used to modify the status of tasks. You will find those tools in each Working View.
See Task Status Tools for more details.
|
Managing Links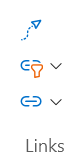 The Links section of the ribbon groups the tools that are relevant to logic tie management in one place.
See Logic Tie Management for more details.
|
General Layout Tools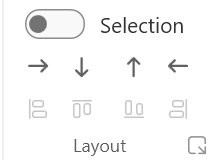 The general layout tools are used to automatically arrange the tasks without applying a swimlane.
See Layout Tools for more details.
|
Swimlane Layouts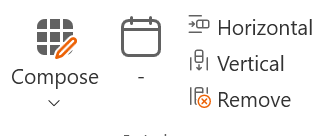 Swimlanes are used to arrange the tasks into swimlanes based on the attributes assigned to them. Swimlanes can be applied with dates or without dates.
See Swimlane Layouts for more detail.
|
Groups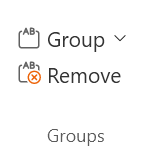 The Grouping tools can be used to group tasks based on common attributes. Groups can be selected and moved around with their tasks. The resulting groups are automatically nested when grouping by Floor, Zones, Spaces, Elevations, or Devices since those attributes belong to other attributes in the hierarchy.
|
Selection Tools Use the selection tools to change how vPlanner selects tasks.
|

Daily Planning Board The Daily Planning Board is a special view accessible from the Manage View and allows you to visualize multi-day tasks as a series of single day tasks without actually splitting them.
See the Daily Planning Board for more details.
|