
5.4. Making Commitments (Team Members)
Commitments identify the tasks that the team agrees to at the start of a workplan. Team members review their available work and pick the tasks that they are ready to place on the workplan by moving them to the ToDo column in the Kanban View or by committing them in the Manage View. This action changes the status of those to be Committed Pending (meaning they are proposed commitments pending the approval of the team manager so that they become commitments when the workplan is created).
Required vs Backlog: vPlanner helps guide the team towards committing more of the required tasks to improve commitment level which improves the chances that the milestones will be met.
|
After team members finish making their commitments, a Team Manager will then create the Workplan for the team. When the workplan is created, the system will automatically convert the Forecast Start (FS) and the Forecast Finish (FS) dates to Committed Start (CS) and Committed Finish (CF). At this point, the tasks are considered part of a Workplan and vPlanner begins to track commitment reliability metrics.
 |
 |
|
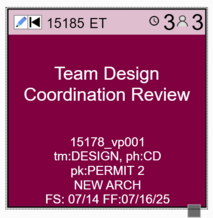
Planned Task
|
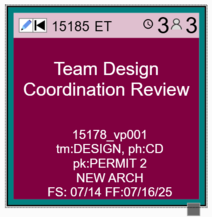
ToDo (or Committed Pending) Task
|
Identifying Available Work
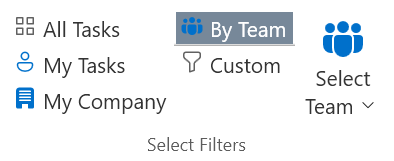
As a team member you can identify available work from the Commit ribbon and you can do this in one of three ways depending on which interface you are most comfortable with.
Option 1: Committing from the Kanban View
Simply switch to the Kanban View which is configured to show available work by default for the given week. Click My Tasks or My Company tasks. If you have available work it will be shown under the Available Work column. Click and hold the left mouse button and drag the card to the To Do column to make a commitment. This process can be done in realtime with other team members doing the same thing. When other team members commit to tasks that constrain your own, more available work may show up for you in the available work column. You may find it useful to also open the Focused view so you can see the pull plan as well.
Notes:
|
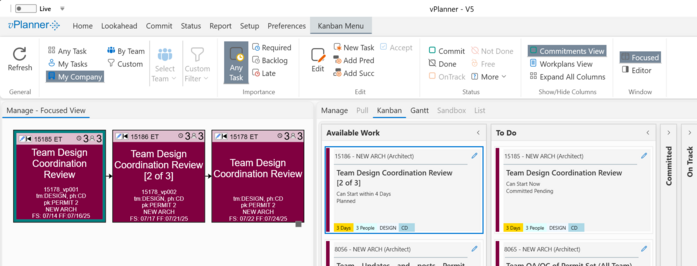
Figure 42 – Making Commitments using the Kanban View - with Focused View Open
Option 2: Committing from the Manage View
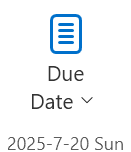
Select the Manage View and click the Commit menu in the ribbon to open the Commit tools. Click My Tasks or My Company tasks, then click the Available work button. vPlanner will display the available work into a daily swimlane arranged vertically.
To make commitments, select the task or tasks you wish to start, then click the Commit button on the ribbon under the status section.
Note: If the Available Work count shows zero, then you have no available work for this workplan.
|
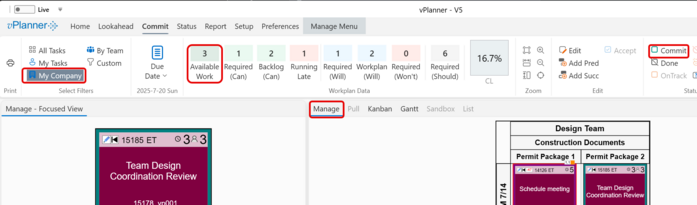
Figure 43 – Making Commitments from the Manage View
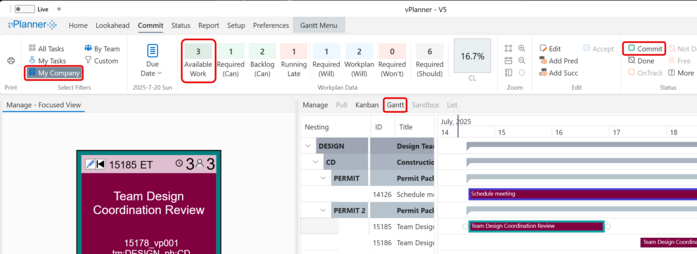
Option 3: Committing from the Gantt View
Select the Gantt View and click the Commit menu in the ribbon to open the Commit tools. Click My Tasks or My Company tasks, then click the Available work button. vPlanner will display the available work in the Gantt View. We recommend that you always use the Focused View when using the Gantt View to make commitments as it will show you the selected tasks in the context of the larger plan.
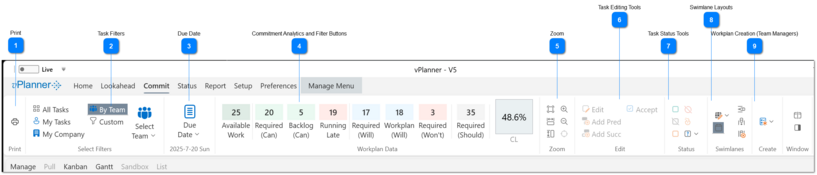
The Commit Ribbon Features
The Commit Ribbon icons will be displayed in three size options depending on your screen resolution.

Figure 44 – Fully Expanded Commit Ribbon

Figure 45 – Commit Ribbon on a lower resolution monitor

Task Editing Tools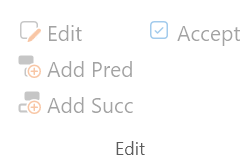 The task editing tools work in a similar way to the Manage View. The only difference is that you can edit only one task at a time. See Editing Tasks for more information.
|
Task Status Tools or or 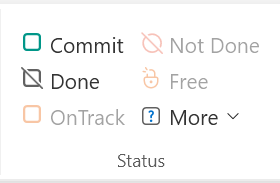 The status tools work in a similar way to the Manage View. The only difference is that you can status one task at a time. See Status Tools for more information.
|
 or
or 
Workplan Creation (Team Managers) or or 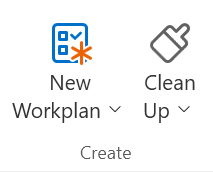 The workplan creation tools are under this button. Users with Team Manager access or higher can use those tools to create workplans. See Workplan Management for more details.
|