3.2. The Main Window
The Main Window is organized into Working Views. Each working view has a dedicated ribbon on the toolbar that includes all the tools that apply to that Working View.
The Manage View is the default working view and will be visible after you open a project. This is where you would do most of the work in vPlanner.
To show tasks or workstreams in the Manage View you can use the Filter tool to isolate them based on certain assigned attributes or click one of the main ribbon tools such as the. Lookahead, Commit, Status ribbons.

If an Item in the interface is grayed out, it indicates that your user permissions do not allow you to use that specific item. The exception to this rule are the editing and status tools which will activate when you select a task or tasks that you have permissions to edit or status.
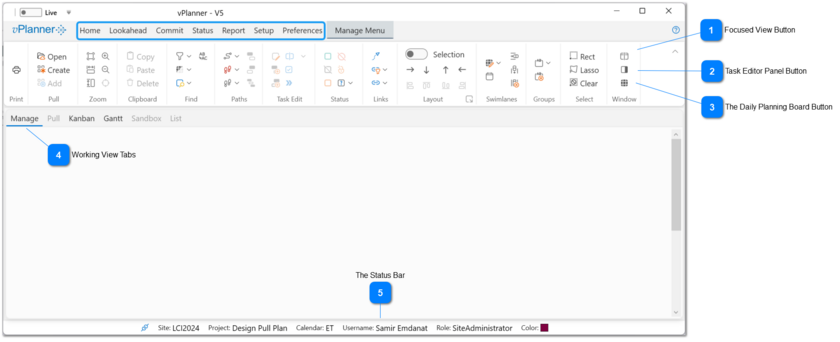
Focused View ButtonThe Focused View is a special working view used to drill down and review tasks in another working view. Use this button to show or hide the focused view. It is available from all working view ribbon tools. See Focused View for mode details.
|
The Daily Planning Board ButtonThis button is only available in the Manage View. Use it to create a Daily Planning Board from the tasks in the Manage View. See Daily Planning Board for more details.
|