6.3.3. P6 XLSX File
The P6 Excel format will produce an Excel spreadsheet formatted for importing the data into P6. You can use this format to automatically map vPlanner attributes to P6 User Defined fields by using a template mapping file that you produce from P6 and use in vPlanner. This section will walk you through the steps of setting up P6 to receive data from vPlanner and how to produce the template mapping file and why.
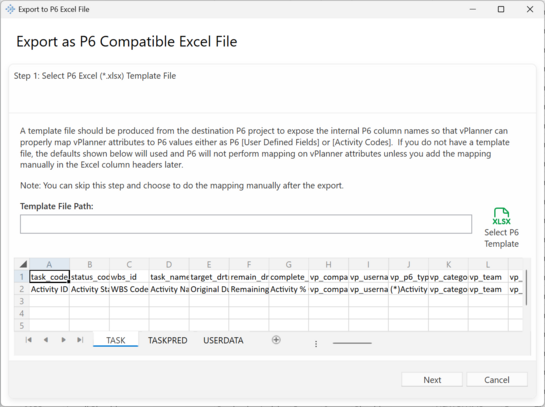
Figure 90 – Export Screen in vPlanner
Step 1: Start in the target project in P6 and make sure you have set up the proper user defined fields from the Import P6 Section plus the new ones in this section. The full list of items to set up is below. The ones in Italics are the same as what we used in the Import from P6 setup, the new ones are the bottom and are used to map dates from vPlanner to date fields in P6:
|
|
P6 Code
|
vPlanner Target
|
Recommended Mapping Method
|
P6 Value Field
|
Matched To in vPlanner
|
|
|
vp_company
|
Company
|
P6 Activity Code
|
Value or Description
|
Name or Abbreviation
|
|
|
vp_username
|
Username
|
User Defined Field (text)
|
Description
|
Username
|
|
*
|
vp_component
|
Component
|
User Defined Field (text)
|
Description
|
Component Name
|
|
*
|
vp_floor
|
Floor
|
User Defined Field (text)
|
Description
|
Floor Name
|
|
*
|
vp_zone
|
Zone
|
User Defined Field (text)
|
Description
|
Zone Name
|
|
*
|
vp_space
|
Space
|
User Defined Field (text)
|
Description
|
Space Name
|
|
*
|
vp_system
|
System
|
User Defined Field (text)
|
Description
|
System Name
|
|
*
|
vp_device
|
Device
|
User Defined Field (text)
|
Description
|
Device Name
|
|
*
|
vp_phase
|
Phase
|
User Defined Field (text) or Activity Code
|
Value or Description
|
Phase Name
|
|
*
|
vp_team
|
Team
|
User Defined Field (text)
|
Description
|
Team Name
|
|
*
|
vp_department
|
Department
|
User Defined Field (text)
|
Description
|
Department Name
|
|
*
|
vp_package
|
Package
|
User Defined Field (text)
|
Description
|
Package Name
|
|
|
vp_forecast_start
|
FS
|
User Defined Field (Start Date)
|
|
|
|
|
vp_forecast_finish
|
FF
|
User Defined Field (Finish Date)
|
|
|
|
|
vp_lrm_start
|
LS
|
User Defined Field (Start Date)
|
|
|
|
|
vp_lrm_finish
|
LF
|
User Defined Field (Finish Date)
|
|
|
|
|
vp_required_start
|
RS
|
User Defined Field (Start Date)
|
|
|
|
|
vp_required_finish
|
RF
|
User Defined Field (Finish Date)
|
|
|
Step 2: Produce an excel Mapping File from P6
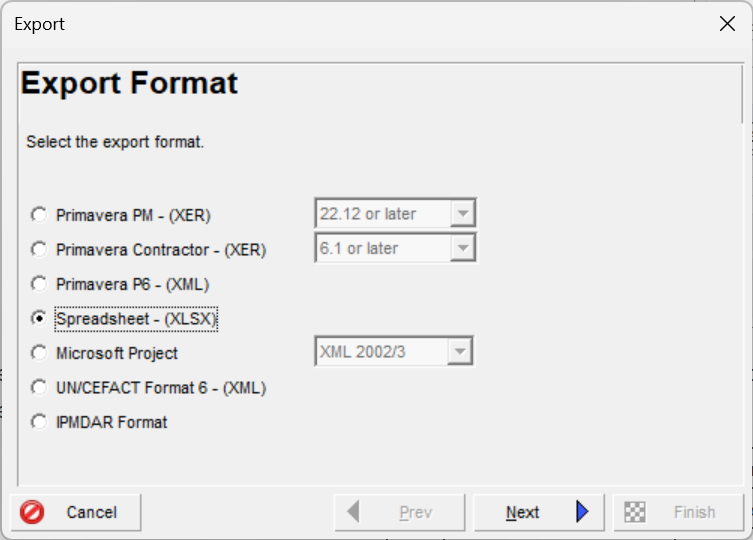
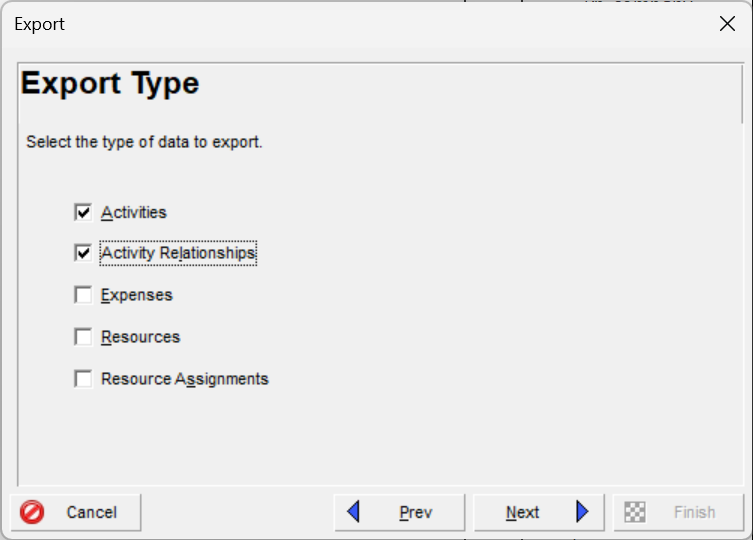
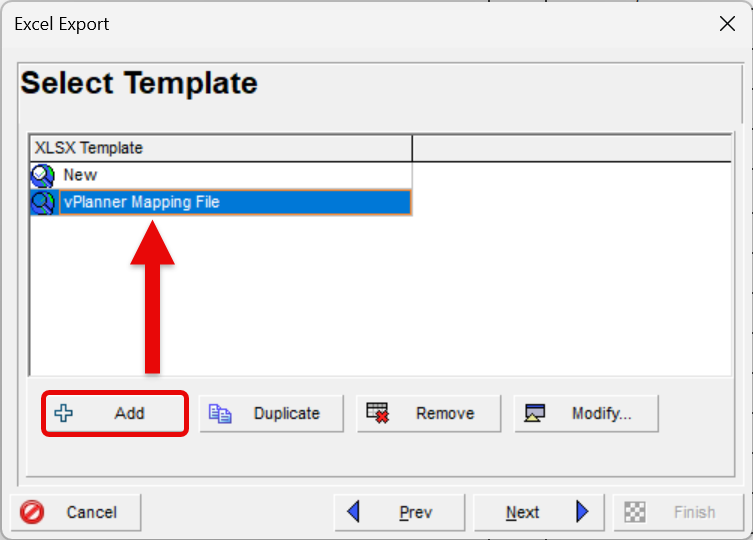
Figure 91 – Create or Modify the Template Mapping File
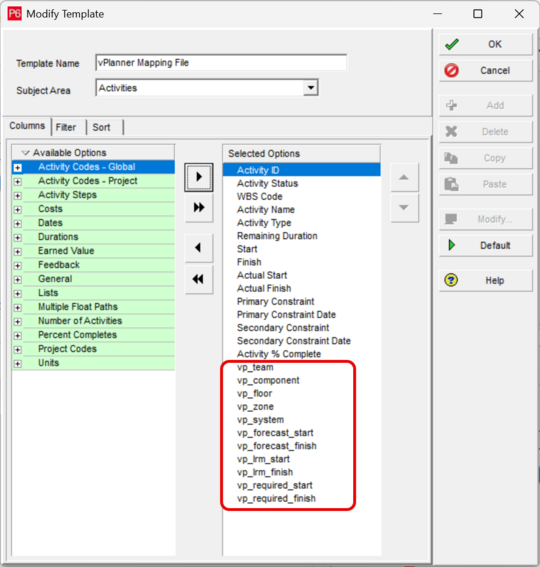
Figure 92 – Expose the Activity Code and User Defined Fields to the Mapping File and save the result as an Excel file
Step 3: Open the template mapping file in Excel and delete everything except for the first two rows which are what vPlanner will use for the mapping process. Do this for the Tasks and the Links sheets.
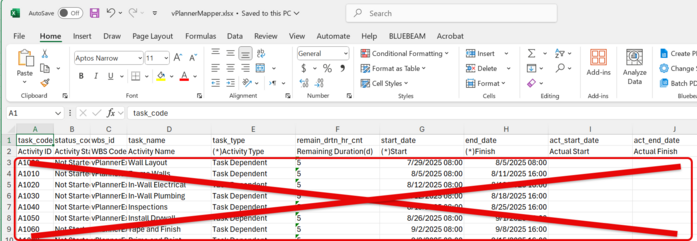
The way the mapping file works is that P6 will expose its internal column names in row1 for each User Defined field or Activity Code. vPlanner will recognize those columns and will write the corresponding values into them. When you import to P6, it will look at the internal column name and will start reading from row number 3 (it will skip the 2nd row as it is there for information). So for example the values under column R (user_field_230) which represent the floor names in vPlanner will be written to the User Defined field vp_floor in P6.
You can at this point keep a copy of this mapping file as you do not need to repeat the steps 1 to 3 next time you need to export from vPlanner and import to the same project in P6.

Figure 93 – Column Mapping Information for P6 Use
Step 4: Back in vPlanner open the template excel file and click next on the Import Manager first page (make sure that the file is not open in Excel first). The contents of the mapper file will be shown in the preview spreadsheet. Click Next.
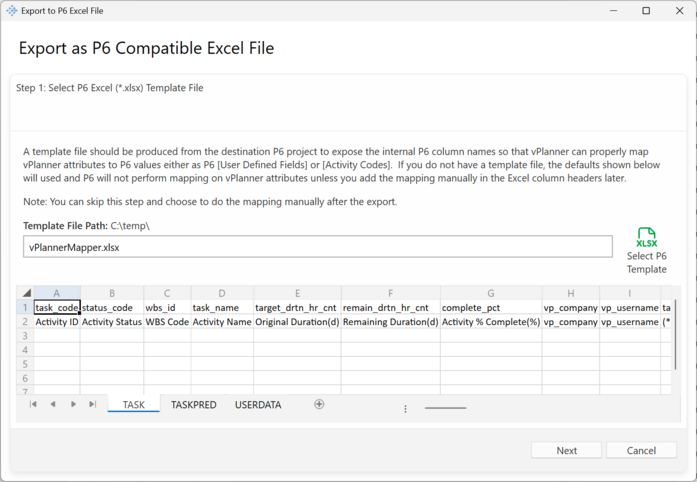
Figure 94 – Mapping File Opened in the Export Window
Step 5: Configure the Export Settings
You can configure some of the export settings on this screen, below is an explanation of the less obvious ones.
TimeZone: vPlanner dates are always stored in universal time. You can convert them at export time to one of the timezone options in the pull down.
Date Format: Depending on the version of P6 you have you can set the date format style. In newer versions of P6 this no longer seem to make a difference.
P6 Project ID: this is important to set correctly from the target project ID in P6 so that the Wbs codes map correctly. You will see a sample value so you can double check against P6 and you should also review the result in Excel to make sure things look the way you expect them from a WBS point of view and make corrections or fix missing value before you import to P6. You can do the fixes by typing directly in the Excel file produced from vPlanner.
User External ID when Possible: vPlanner by default will replace the vPlanner ID with the External ID so that it becomes the Activity ID in P6. If there is no External ID in vPlanner the vPlanner ID will be used.
Skip Finish-to-Start Logic between the Original Imported Tasks: If you have previously imported tasks into vPlanner from P6 and they are still retain their Imported type in vPlanner. You can choose to not import the logic ties between them back to P6. This will preserve any settings and lags you had in P6.
Impost P6 Task Dependent Constraints: Keep this setting on to create Start On and Finish On constraints on the exported tasks so that P6 honors the vPlanner calculated dates when it calculates the schedule. This improves the alignment between P6 calculations and vPlanner calculations.
Create P6 Milestones from vPlanner Milestones with Zero Durations: vPlanner will export this correctly with the proper constraints and activity types, but it seems P6 is broken and will not import those as true milestones. However, you can fix this via a Global Replace rule in P6 and looking for Zero Duration tasks with Must Finish On or Must Start On constraints.
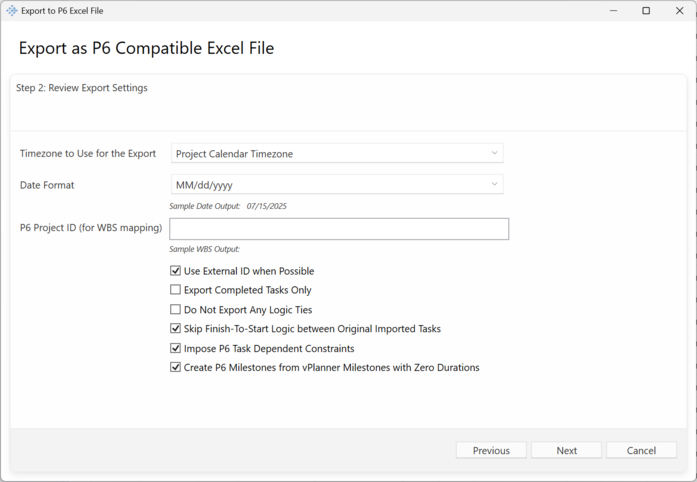
Figure 95 – Export Options
The last screen is the preview of the file that will be exported to Excel review it and click Export. Now you can go to P6 and import the file.