
6.2.2. Import P6 XML
vPlanner can read schedules from Primavera P6 using the P6 XML format and can automatically map User Defined fields or Activity Codes from P6 to vPlanner attributes.
The XML import process from P6 to vPlanner supports files generated from:
-
A single P6 project
-
Multiple P6 projects within the same P6 database, as long as Activity IDs are unique across all linked projects included in the XML file.
If you import an XML file that includes multiple linked projects for the first time, and those projects contain duplicate Activity IDs, the import will still succeed. However, you will not be able to re-import the same file again, as it will result in duplicate External-IDs in vPlanner.
|
Prepare P6 for Exporting to vPlanner
To automate the mapping process you need to code P6 with either User Defined fields to Activity Codes that match the attributes defined in the destination project in vPlanner. The code names must match between the two systems and you can follow the naming convention below to fully automate the code mappings.
In the below the P6 Code column can be a User Defined Type or an Activity Code Type but not both.
We recommend using Activity Codes for:
-
Company names as they are likely the same across projects for external partners.
-
Phases since work phases can be standard across projects.For the rest of the mappings we recommend that you use User Defined Fields as they are usually unique to a project. It is also simpler to import back into user defined fields than to Activity Codes.
If you plan to Export from vPlanner and import into P6, see the P6 Export section for additional User Defined Fields that you should set up in P6 to store vPlanner dates.
|
Export from P6
Once P6 tasks are coded correctly, you will need to create an XML file. Make sure the option to export all project level layouts is not checked. We are only concerned with the XML file here.
| ||
Table 6 – Export Tools in P6
|

Importing the XML File into vPlanner
Step 1: Open the Import Manager from the vPlanner menu and select the P6 Import option. Select the XML file. If the file is a valid P6 XML, vPlanner will provide a summary of the file contents and may give some warnings if there are issues with the file. Review those carefully before proceeding to the Next step.

Figure 69 – Selecting a P6 XML File
Step 2: The Next screen is the mapping section. Assuming the XML files includes the mappings recommendations above, vPlanner will automatically detect the codes and user fields and will automatically match them to vPlanner attribute types. You can also perform the matching manually or clear the mappings and auto apply them using the buttons on the right. Click Next to go to the next screen.

Figure 70 – Applying Mappings
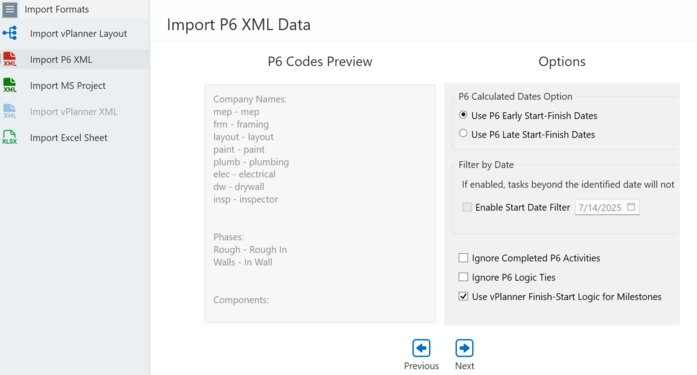
Step 3: The next screen provides a list of identified codes in the XML file and provides some options and settings for the import. If you have not yet coded vPlanner with the same codes in the XML file. This is good place to stop, copy the list under P6 Codes Preview and keep them in a text file to configure vPlanner attributes with values matching what you are bringing from P6 or make corrections in P6 and re-export the XML.
Step 4: The next screen will provide a task list of the P6 activities that are found in the XML file and their mappings to vPlanner fields. You can now apply filters to narrow down what will be imported into vPlanner or import the entire list. Once you are done applying filters, Click Next to go to the preview screen.

Step 5: The preview screen provides a preview of the final import will look like before bringing the tasks into the project. Here you can make final adjustments to logic or delete tasks that you do not wish to import. If you make a mistake, you can undo or you can switch back to the previous screen and then the preview screen to reset it. Click Import to bring the tasks into the project.
Note that vPlanner will look for matching tasks from a previous import based on their external ID. If a match is found it will update the existing task, otherwise a new task will be created.
|
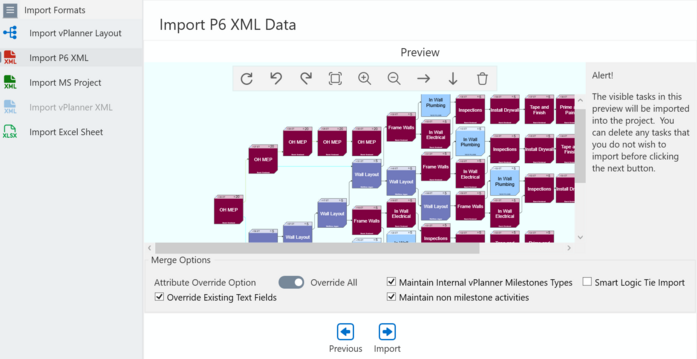
Figure 71 – Import Preview Screen
Controlling how Updates are Done for Matching Tasks:
Override All: Code from P6 will override any Attributes in vPlanner.
Partial Override: Description & Duration & Status will be updated. Other vPlanner attributes will not be changed.
Maintain Internal vPlanner Milestone Type: If you had converted a previously imported task to a vPlanner milestone, it will remain as is but its required date will be updated.
Maintain non-milestone activities: if you had converted a P6 activity to a vPlanner activity, its type will remain the same.
Smart Logic Tie Import: logic between imported tasks if they match the new XML file will be removed before the import so that the new logic replaces it. This will resolve issues with deleted link in P6 remaining in vPlanner from a previous import.
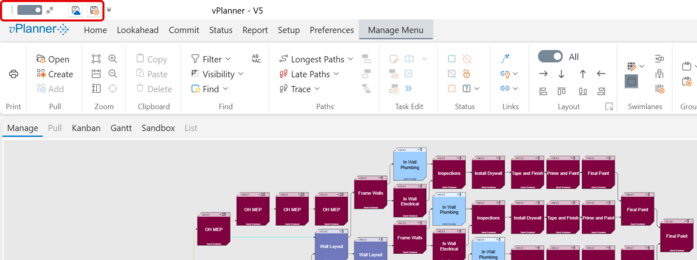
The results of the import will then be shown in the Manage View and you will be switched automatically to semi-live mode. The imported tasks are not saved at this point and you can review them in the context of other tasks in the project. You can save them or discard them using the buttons at the upper-left side of the vPlanner window then switch back to live mode.
Example Setup in P6
Code Definitions for Company and Phases which are common to all projects (note that this can be done using User Defined fields as well but don't use both on the same project).
| ||||||
Table 7 – Codes Setup
|
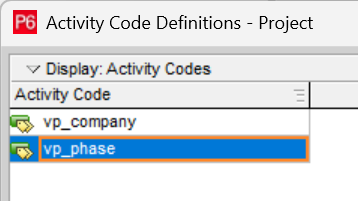
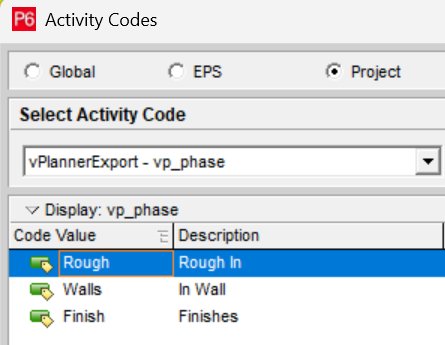
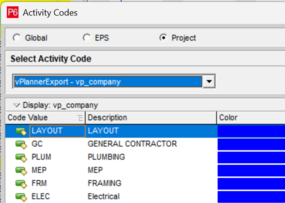
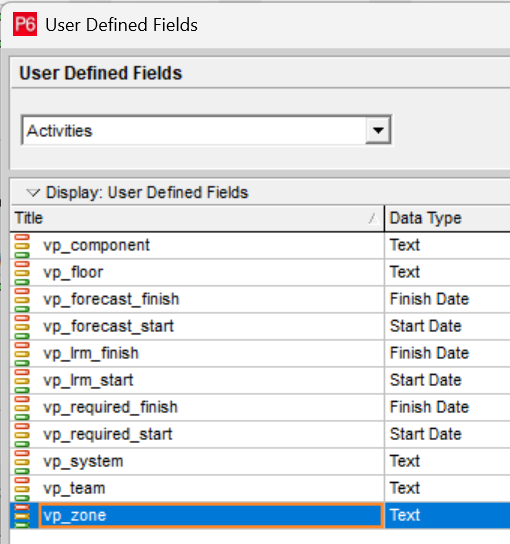
Figure 72 – User Defined Fields Setup (note date types are for importing from vPlanner)
Example Schedule in P6
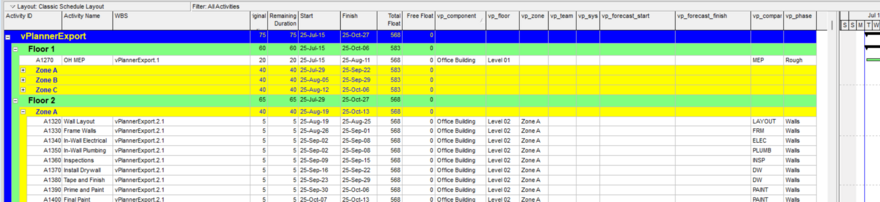
Figure 73 – Coded P6 Schedule
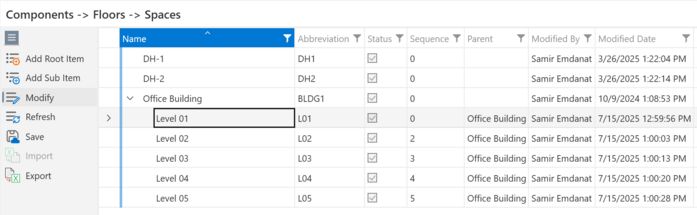
Figure 74 – Example Attributes for Locations in vPlanner (note that names match User Field Values)
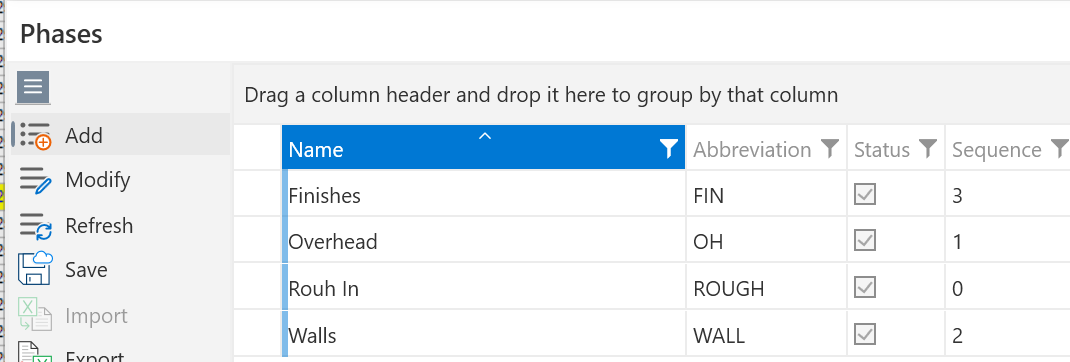
Figure 75 – Example Phases in vPlanner

Figure 76 – Final Import Result in vPlanner