6.2.5. InTakt Excel Sheet
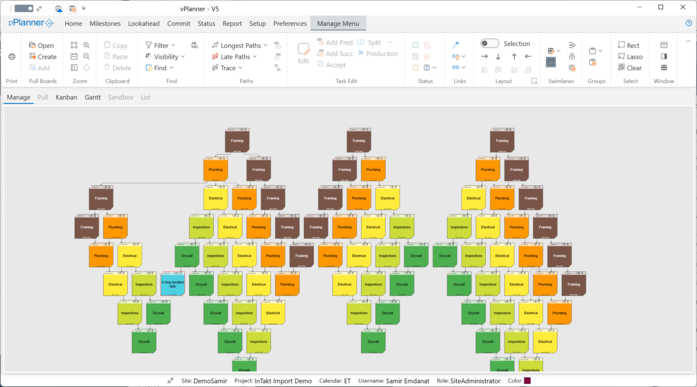
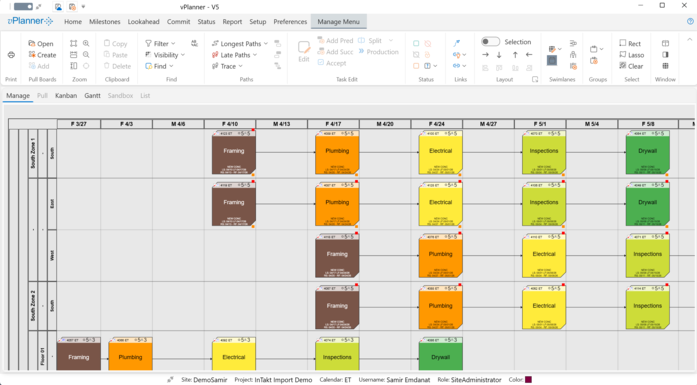
The InTakt Import Manager allows you to import entire takt plans created using the InTakt software. The phases, locations, takt activities, durations, colors and all logic ties will import. vPlanner will maintain the task id from InTakt and stores it in the ExternalID field for future reference.
InTakt does not have unique global ids for its tasks and thus the InTakt TaskIDs are not guaranteed to be unique if you import from different source InTakt projects into the same vPlanner project. To ensure that vPlanner synchronizes properly only import from the same source InTakt project.
|
What will be Imported?
You will be able to import Activity information including the Phase, Primary Area, Sub Area, Company, Description, Duration, Resources, Dates, Colors, and Logic Ties. If you set up the InTakt and vPlanner as described in this section, vPlanner will auto map this information to the appropriate attributes.
vPlanner will be able to assign the correct logic tie for resource flow vs work flow as well.
Note that deleted items will not be updated if you have previously imported them and you will need to manually remove them in vPlanner.
|
Preparing both Systems
This preparation is required if you wish to take advantage of the rule-based mapping that is implement in vPlanner so that InTakt activities.
Phases:
You should create an identical vPlanner Phase name for each InTakt Phase you plan to import.
PrimaryAreas & SubAreas: InTakt is limited in terms of how you define areas and thus this may create some ambiguity when you import into vPlanner. This is especially problematic if you have a project of multiple buildings each with different floors, elevations, and takt zones. However, if you follow the approach below, you should be able to automatically map most cases without issues.
PrimaryAreas & SubAreas Naming:
Name you primary areas using this convention (especially if you have multiple buildings):
-
[COMPONENT_NAME]>[FLOOR_NAME] and sub areas as [ZONE_NAME].
-
[COMPONENT_NAME]>[ELEVATION_NAME] and sub areas as [ZONE_NAME].
Example InTakt Setup
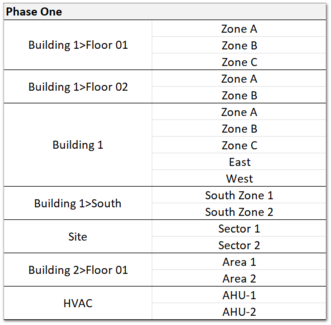
The below describes a Phase of Work (Phase One), two different buildings Building 1, and Building 2.
Building 1 as two Floors and three Zones (Zone A,B,C) and Two Elevations (East and West)
Building 2 has one Floor and two zones (Area 1 and Area 2) and a South elevation with two work zones (South Zone 1, and 2).
Site has two work areas (Sector 1 and 2).
The HVAC system as two devices (AHUs 1, and 2).
Example vPlanner Setup
You need to set up Phases, Locations include Components, Floors, Elevations, and Zones to match the above. If you are importing Systems you should do the same for those and if you wish to import Company names if they are defined in InTakt their names in vPlanner should match InTakt. During the import, vPlanner will pick the first user under the matching company and will assign it to the imported task.
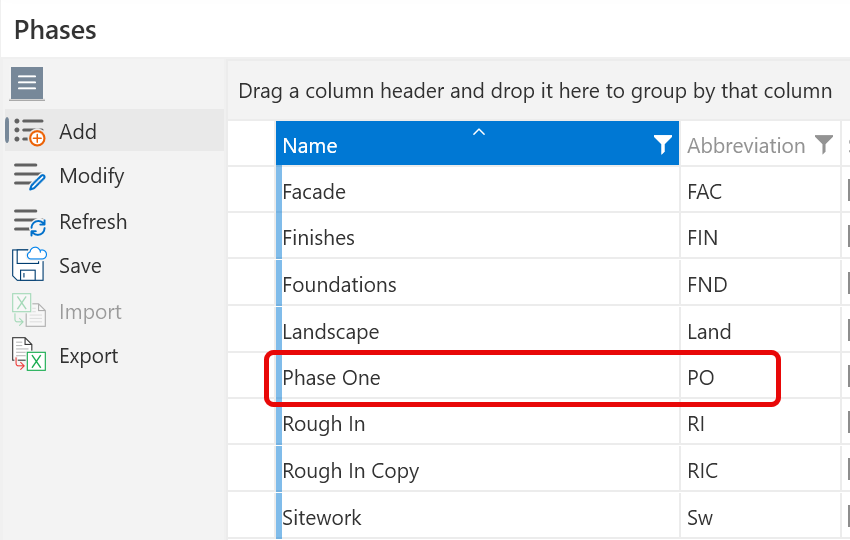
Figure 84 – Setting Up vPlanner Phases to Match (added Phase One)
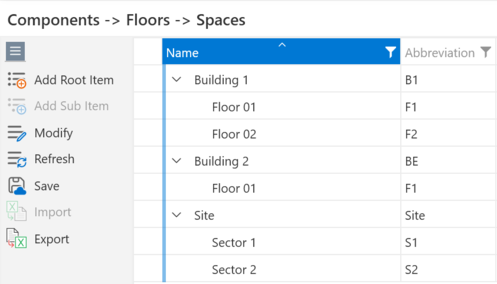
Figure 85 – Setting Up vPlanner Buildings and Floor names to match
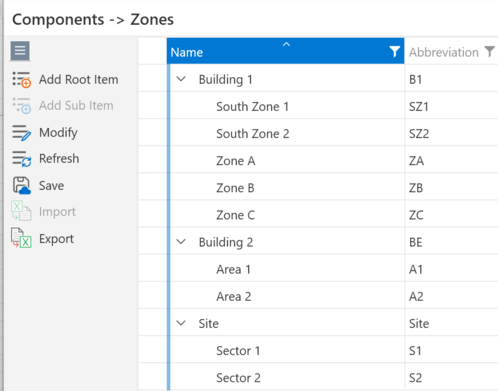
Figure 86 – Setting Up vPlanner Zones to Match
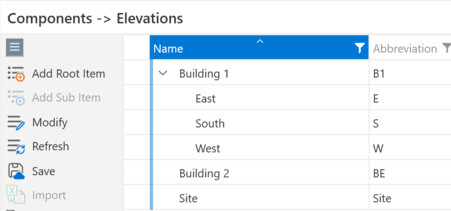
Figure 87 – Setting up vPlanner Elevations to Match
Steps for a Successful Import:
Step 1:
In the InTakt software export your project to the Excel format. The resulting excel file has several tab sheets. The most important ones for the import are the Activities and the Relationships. Currently vPlanner will not import subtasks.
Step 2:
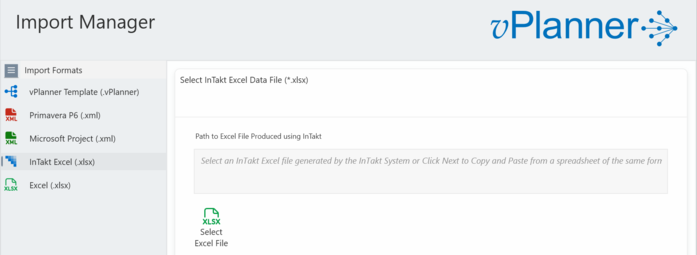
Open the Excel file in vPlanner and click Next.
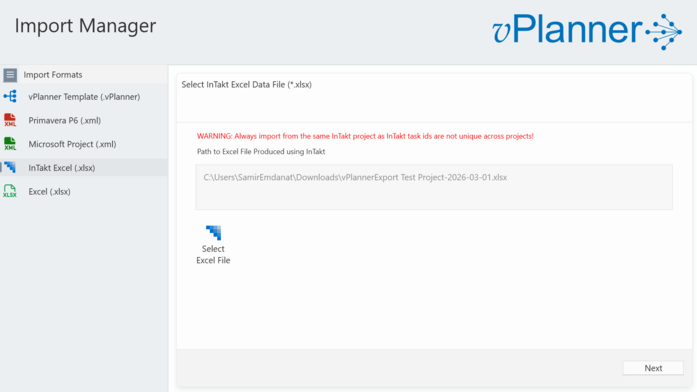
Step 3:
The next page is simply a preview of the contents of the Excel file (read-only). Click Next (lower right)
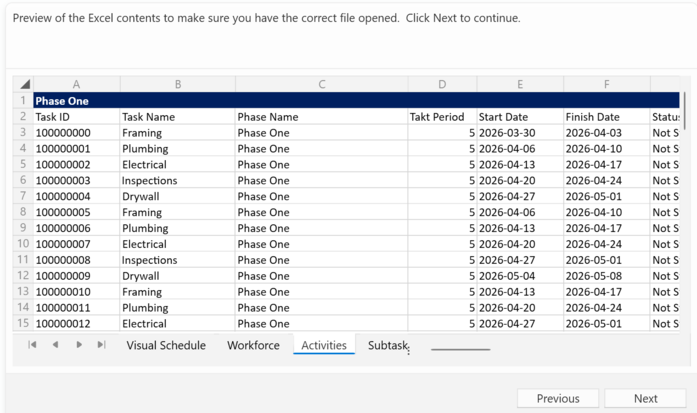
Step 4
The next page will show all the phases as defined in the Excel file. Pick the phase names that you wish to import. You can make multiple selections or a single selection.
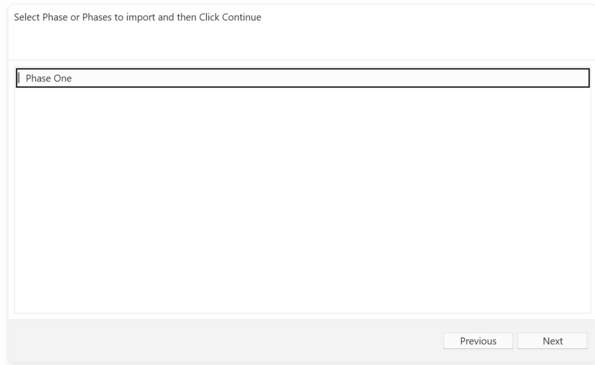
Step 5:
The next page will show the tasks of the selected phase or phases (read-only). This shows that vPlanner was able to parse the Excel file contents and how it is understanding them before creating vPlanner tasks. Note that you can select to map locations or not by clicking the Setting at the bottom. Mapping is enabled by default and if the project is set up per the recommendations above, then the assignment to attributes will be performed automatically. Click Next to continue.
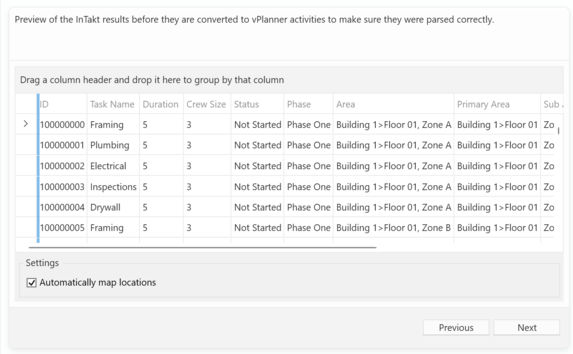
Step 6:
The next page will show the converted tasks to vPlanner tasks and attributes. Make sure to review where the phases and locations, and colors are stored in User fields and if you have selected the option to Automatically map locations, the PrimaryAreas and SubAreas will be automatically matched to the corresponding vPlanner locations.
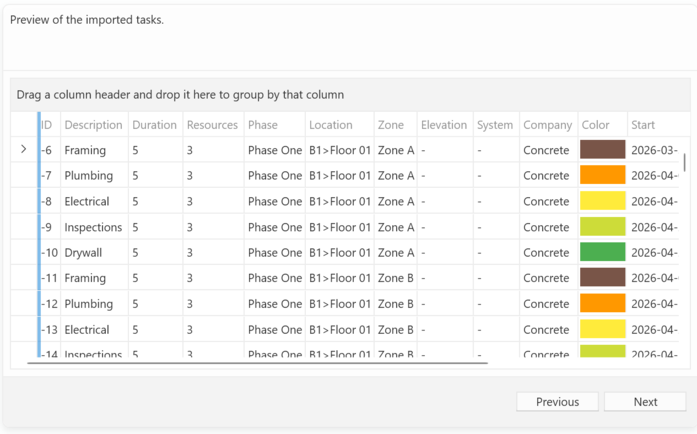
Step 7
Click Next to preview the tasks in the vPlanner format. You can select and delete tasks and logic that you do not wish to import at this point. You can also select to update previous imported task attributes to match the new information in the imported file.
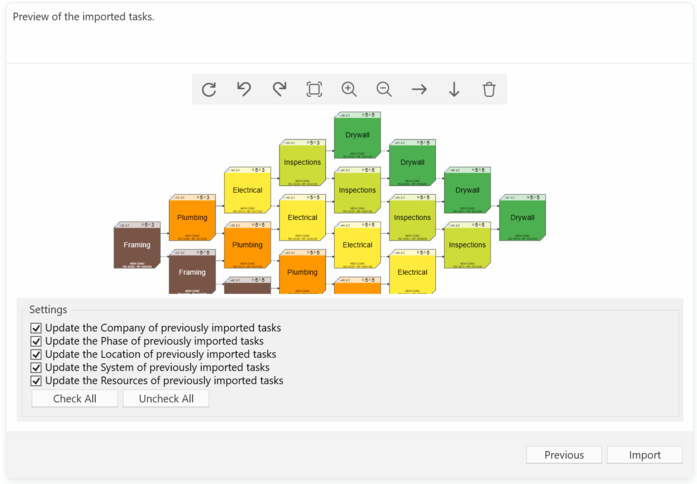
Step 8:
Click Import to import the result into vPlanner.
The results will now be shown in the Manage View and you will be switched to offline mode. You can save or ignore the results like any other tasks in offline mode.